Pantum P2200 P2207 P2500 P2507 P2500w P2502w P2506w P2509w P2500nw Chipless firmware

| Model | Version firmware |
|---|---|
| P2200 P2207 P2500 P2507 P2500w P2502w P2500nw |
2.A.0.6 3.A.0.3 3.A.0.5 3.A.0.7 3.A.1.1 3.A.1.4 3.A.1.5 3.A.1.7 3.A.2.0 3.A.2.2 3.A.2.6 3.A.3.3 4.A.0.2 4.A.0.5 4.H.0.1 4.H.0.2 |
.
To create a chipless firmware you need to send the data of your printer: data ID printer
For get printer data ID we recommend using the free program Pantum_Info or Pantum_Chipless
This program have button Get data ID, this data ID code you can send to us
Instruction (Manual) for program firmware [ !!! new instruction]
1. Extract the archive with the firmware
2. Connect printer to computer via USB cable
3. Drag and drop file fix_XXXXXXXXXX_Bichon4_P2500_V3Axx_D0210.acl on usbprns2.exe..
- On the printer, the light will flash quickly in all colors..
- Need to press a button [Cancel / Continue] and release.
- After that, the indicator on the printer will begin to blink slowly in all colors.
- Need wait for the printer to programming (1-2 min) and itself reboot.
4. Done, the firmware is finished.
Instruction (Manual) for program firmware [ !!! old instruction]
-
The software version must be 4.1.1 or higher
-
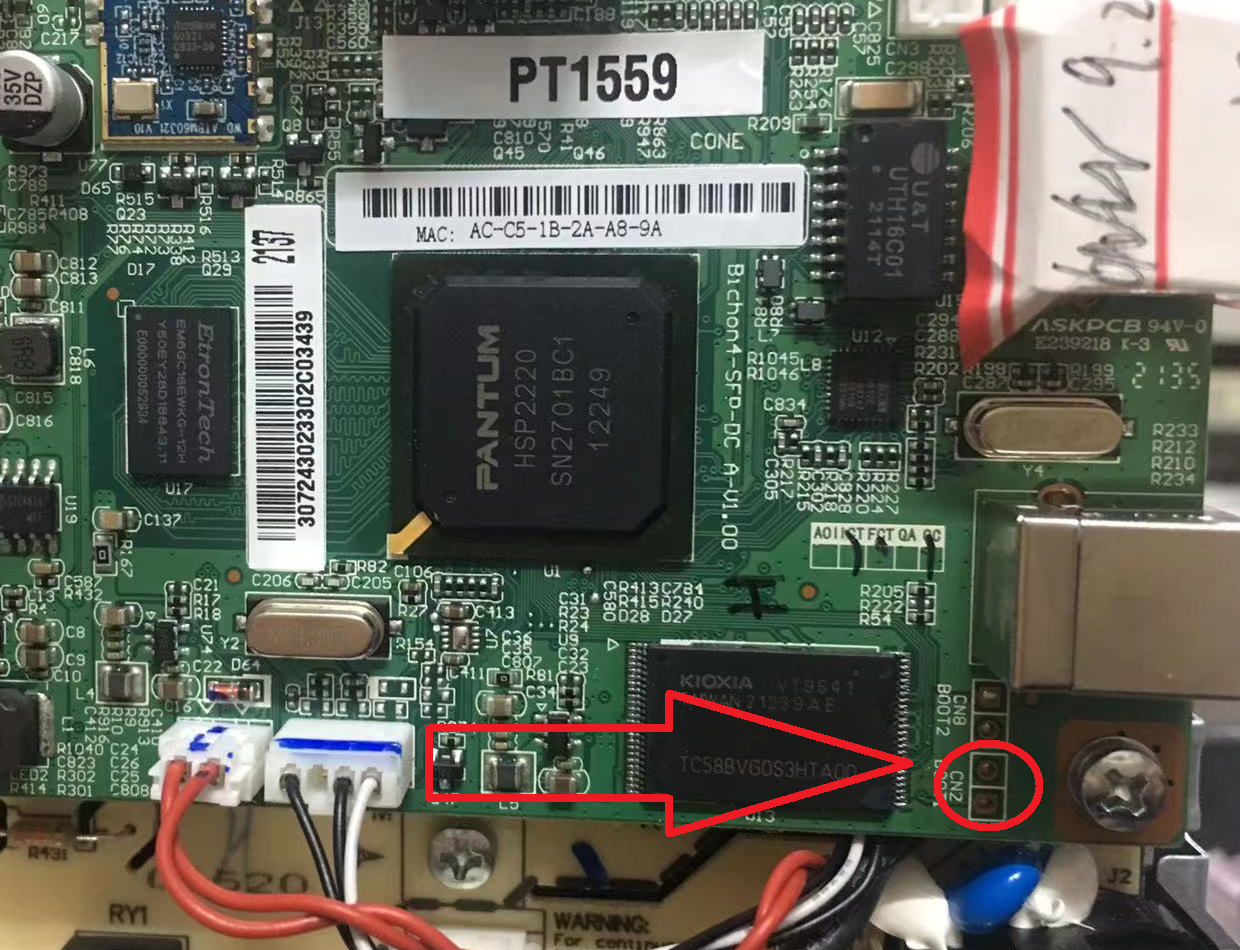
Remove the side cover from the USB cable connection side.
Note: In the upper part of the printer, the cover is fixed with a bolt (the bolt is hidden under the sticker) -
With the printer turned off, close (with tweezers) the BOOT1 [CN2] contacts and turn on the printer
-
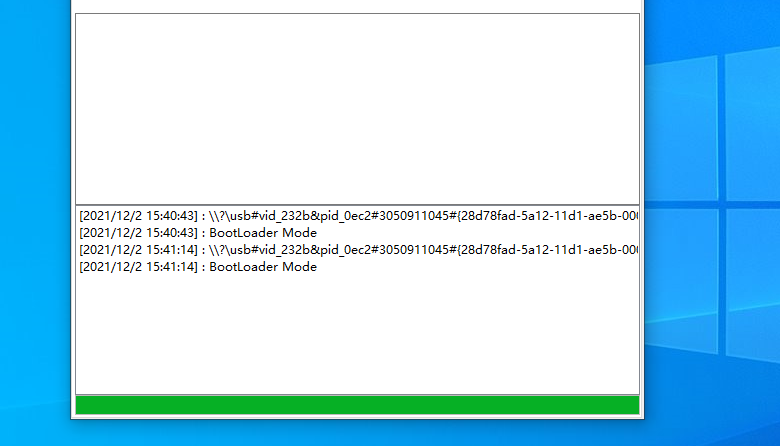
The printer will turn on in Bootloader Mode, this can be checked by clicking the [Get Printer ID] button in the program.
-
Press button [Upgrade Firmware] and select Patch_3.A.0.3.hd
https://orpys.com/file/fw/Pantum/Patch_3.A.0.3.hd -
Wait 30 seconds until the green bar at the bottom of the program fills up. After that, turn off the printer (by holding the power button for 5 seconds, or by disconnecting it from the power supply) and turn on the printer again.
-
Now the printer will enter to mode Bootloader itself
-
After all this, you can send the chipless firmware by clicking [Upgrade Firmware] and select the firmware file Chipless_XXXXXXXXXX_P2500w.fwr. The firmware process can be quite long, more 3 minutes.
Note: While programming the printer, the software will show NOT RESPONDING, but it's actually running [programs the printer] and you have to wait for it to finish -
After successful completion, the bar at the bottom of the program will be completely green and printer will automatically itself restarting.